
At the heart of smart home revolution is the humble Raspberry Pi. This versatile little computer can be the cornerstone of your home automation system, allowing you to control lights, security systems, and even your thermostat from anywhere. Whether you’re a tech enthusiast or a beginner looking for an exciting project, this guide will walk you through building your very own home automation system with a Raspberry Pi.
Why Choose Raspberry Pi for Home Automation?
Raspberry Pi is renowned for its affordability, flexibility, and community support. These features make it an excellent choice for home automation projects. With a Raspberry Pi, you can integrate various sensors, control multiple devices, and create a centralized system that caters to your specific needs. Plus, the plethora of tutorials and community forums means help is always at hand.
Materials Needed
Before you start, gather these essential components:
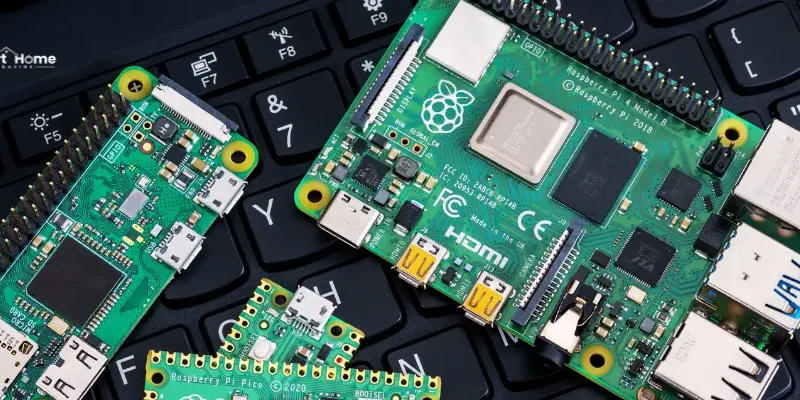
- Raspberry Pi (Model 3 or later recommended)
- MicroSD Card (16GB or larger, with Raspbian OS installed)
- Power Supply for Raspberry Pi
- Breadboard and Jumper Wires
- Sensors and Actuators (e.g., temperature sensor, motion sensor, relays, etc.)
- Software (Home Assistant, OpenHAB, or Node-RED)
- Optional: Case for Raspberry Pi, USB keyboard and mouse, HDMI cable and monitor for setup
Setting Up Your Raspberry Pi
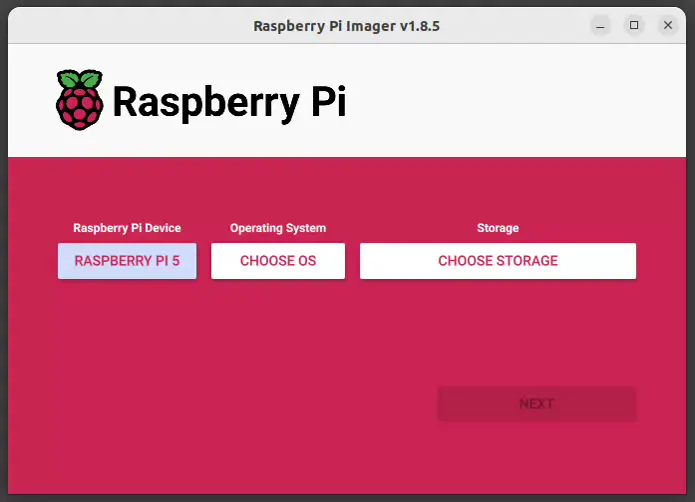
Step 1: Install Raspbian OS
Start by installing the Raspbian OS on your microSD card. You can download the latest image from the official Raspberry Pi website. Use a tool like Balena Etcher to write the image to the card. Once done, insert the card into your Raspberry Pi, connect it to a power source, and boot it up.

Step 2: Initial Configuration
Upon booting, you’ll be prompted to configure Wi-Fi, update the system, and enable SSH for remote access. This ensures that your Raspberry Pi is ready to handle the home automation tasks ahead. Configuring these settings might seem straightforward, but attention to detail is crucial to avoid connectivity issues later. Please also take information from here – https://www.raspberrypi.com/documentation/

Choosing the Right Home Automation Software
Several software platforms can turn your Raspberry Pi into a powerful home automation hub. Here, we will focus on Home Assistant due to its user-friendly interface and extensive device compatibility.
Step 3: Installing Home Assistant
Open a terminal on your Raspberry Pi and enter the following command to install Home Assistant:
curl -sL https://raw.githubusercontent.com/home-assistant/hassio-installer/master/hassio_install.sh | bash -s
Wait for the installation to complete. Home Assistant will provide a robust foundation for your smart home, supporting a wide range of devices and integrations.
Step 4: Configuring Home Assistant
Access Home Assistant by navigating to http://<Raspberry_Pi_IP>:8123 in your web browser. Follow the on-screen instructions to set up your account. Adding integrations for your devices and sensors is the next step. Home Assistant supports many devices, making it easy to integrate your existing smart home gadgets.More information here : https://www.home-assistant.io/installation/raspberrypi/
Connecting Sensors and Actuators
Now it’s time to connect your sensors and actuators to the Raspberry Pi. Use the GPIO pins to attach components like temperature sensors, motion detectors, and relays. For instance, you might use a DHT22 sensor for temperature and humidity readings and a PIR sensor for motion detection.
Step 5: Wiring Your Devices
Using jumper wires and a breadboard, connect your sensors and actuators to the GPIO pins. Ensure each connection is secure to prevent malfunctions. This step is critical, as loose connections can lead to unreliable performance or even damage your Raspberry Pi.
Step 6: Configuring Devices in Home Assistant
To configure your devices, you might need to edit the configuration.yaml file in Home Assistant. This file allows you to define your sensors and actuators. For example:
sensor:
  - platform: dht
    sensor: DHT22
    pin: 4
    name: "Living Room Temperature"
    monitored_conditions:
      - temperature
      - humidity
Creating Automations for a Smarter Home
One of the most exciting aspects of home automation is creating custom automations that respond to various conditions. With Home Assistant, you can easily set up rules and scripts to automate your home.
Step 7: Setting Up Automations
Use Home Assistant’s automation editor to create scripts and automations. For example, you can set a rule to turn on lights when motion is detected or adjust the thermostat based on the temperature sensor readings.
automation:
  - alias: Turn on light when motion detected
    trigger:
      platform: state
      entity_id: binary_sensor.motion_sensor
      to: 'on'
    action:
      service: switch.turn_on
      entity_id: switch.light
Expanding Your Home Automation System
Once you have the basics set up, you can expand your system with additional features. Integrating voice control through Google Assistant or Amazon Alexa allows for seamless interaction. Additionally, setting up remote access enables you to control your home automation system from anywhere in the world.
Voice Control Integration
Adding voice control to your home automation system can greatly enhance its usability. With Google Assistant or Amazon Alexa, you can control your devices with simple voice commands.
Step 8: Integrating Google Assistant or Amazon Alexa
To integrate Google Assistant, follow these steps:
- Create a Project in the Google Cloud Console.
- Enable the Google Assistant API and set up OAuth 2.0 credentials.
- Link your Home Assistant instance with Google Assistant by adding the integration in Home Assistant.
For Amazon Alexa:
- Set Up a Developer Account on the Amazon Developer Console.
- Create a Smart Home Skill and configure it to link with your Home Assistant instance.
- Enable the Alexa Integration in Home Assistant.
Remote Access Setup
Remote access is a crucial feature for controlling your home automation system when you’re away. You can achieve this through services like Nabu Casa or by configuring port forwarding on your router.
Step 9: Setting Up Remote Access
Nabu Casa offers a straightforward solution with a subscription service that supports Home Assistant development and provides secure remote access. Alternatively, you can set up port forwarding on your router, though this requires more technical knowledge and careful configuration to ensure security.
Additional Tips
- Security: Regularly update your Raspberry Pi and Home Assistant to the latest versions for security.
- Backup: Regularly back up your Home Assistant configuration to avoid losing your setup.
- Community Support: Join forums and communities such as the Home Assistant community for support and ideas.
Integrating Additional Devices
The beauty of a Raspberry Pi-based home automation system is its scalability. As your needs grow, you can integrate additional devices and sensors.
Step 10: Adding New Devices
Adding new devices involves wiring them to the GPIO pins and configuring them in Home Assistant. For example, integrating a smart thermostat can provide more precise climate control. Use the same process of editing the configuration.yaml file to include new devices.
climate:
  - platform: generic_thermostat
    name: Home Thermostat
    heater: switch.heater
    target_sensor: sensor.living_room_temperature
    min_temp: 15
    max_temp: 30
    ac_mode: false
    target_temp: 22
    cold_tolerance: 0.5
    hot_tolerance: 0.5
    min_cycle_duration:
      minutes: 5
    keep_alive:
      minutes: 3
    initial_hvac_mode: "heat"
    away_temp: 16
    precision: 0.1
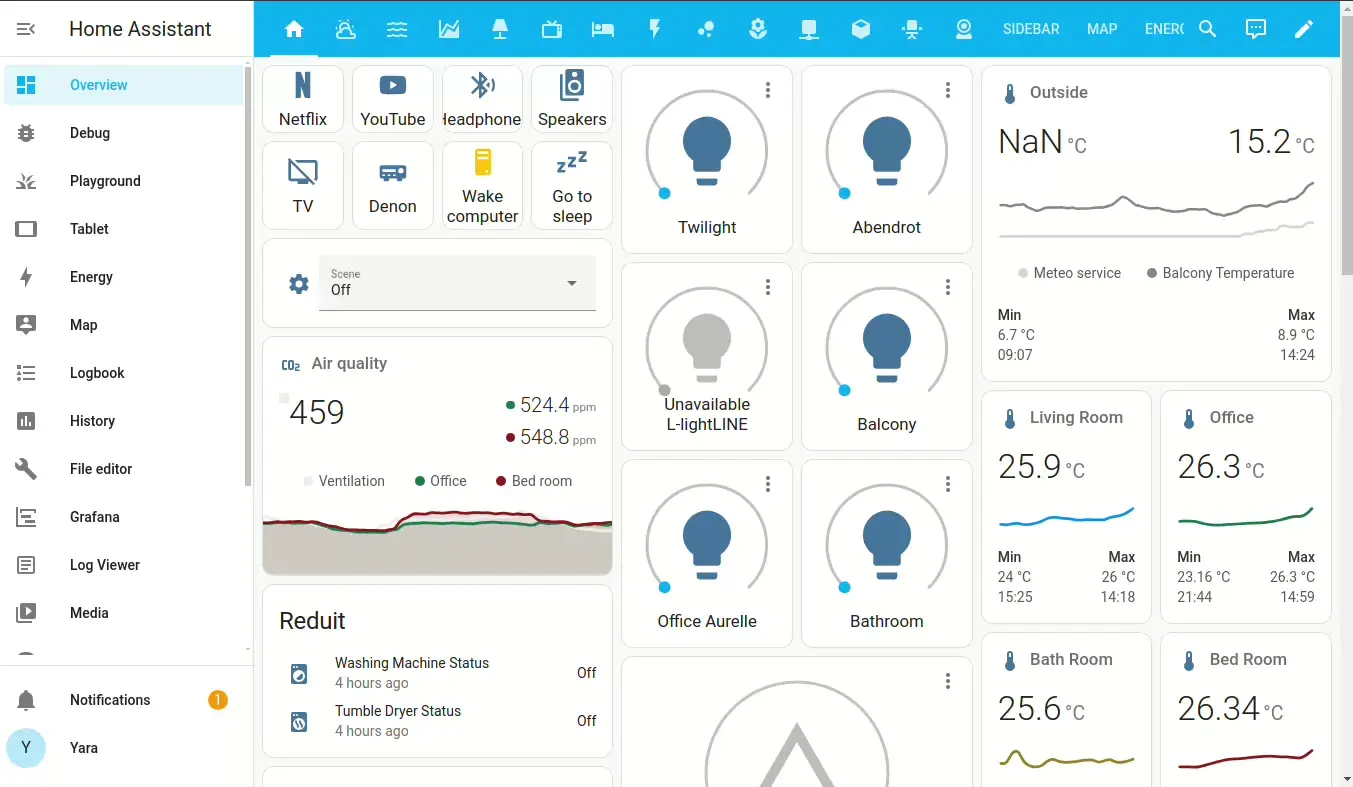
Building Custom Dashboards
Home Assistant allows you to build custom dashboards to monitor and control your devices. This user-friendly interface can be accessed from any web browser or mobile device, providing a centralized control panel for your smart home.
Step 11: Creating Custom Dashboards
To create a custom dashboard, navigate to the Lovelace dashboard editor in Home Assistant. Here, you can add cards that display sensor data, control devices, and show automation states. Customize the layout to suit your needs and preferences.
Troubleshooting and Maintenance
Even with a well-configured system, issues may arise. Regular maintenance and troubleshooting are essential to ensure smooth operation.
Step 12: Regular Maintenance
Keep your system updated with the latest software versions. Regularly check connections and sensor functionality. If issues occur, consult the extensive Home Assistant documentation and community forums for solutions.
Building a home automation system with a Raspberry Pi is an engaging and rewarding project. With the right components and software, you can create a smart home that enhances your daily life. From controlling lights and security to monitoring environmental conditions, your Raspberry Pi can become the brain of your home automation system. Dive in and start building your smart home today!
For more detailed instructions and a range of compatible products, visit the official Raspberry Pi store.


Comments